1. Assessment parameters

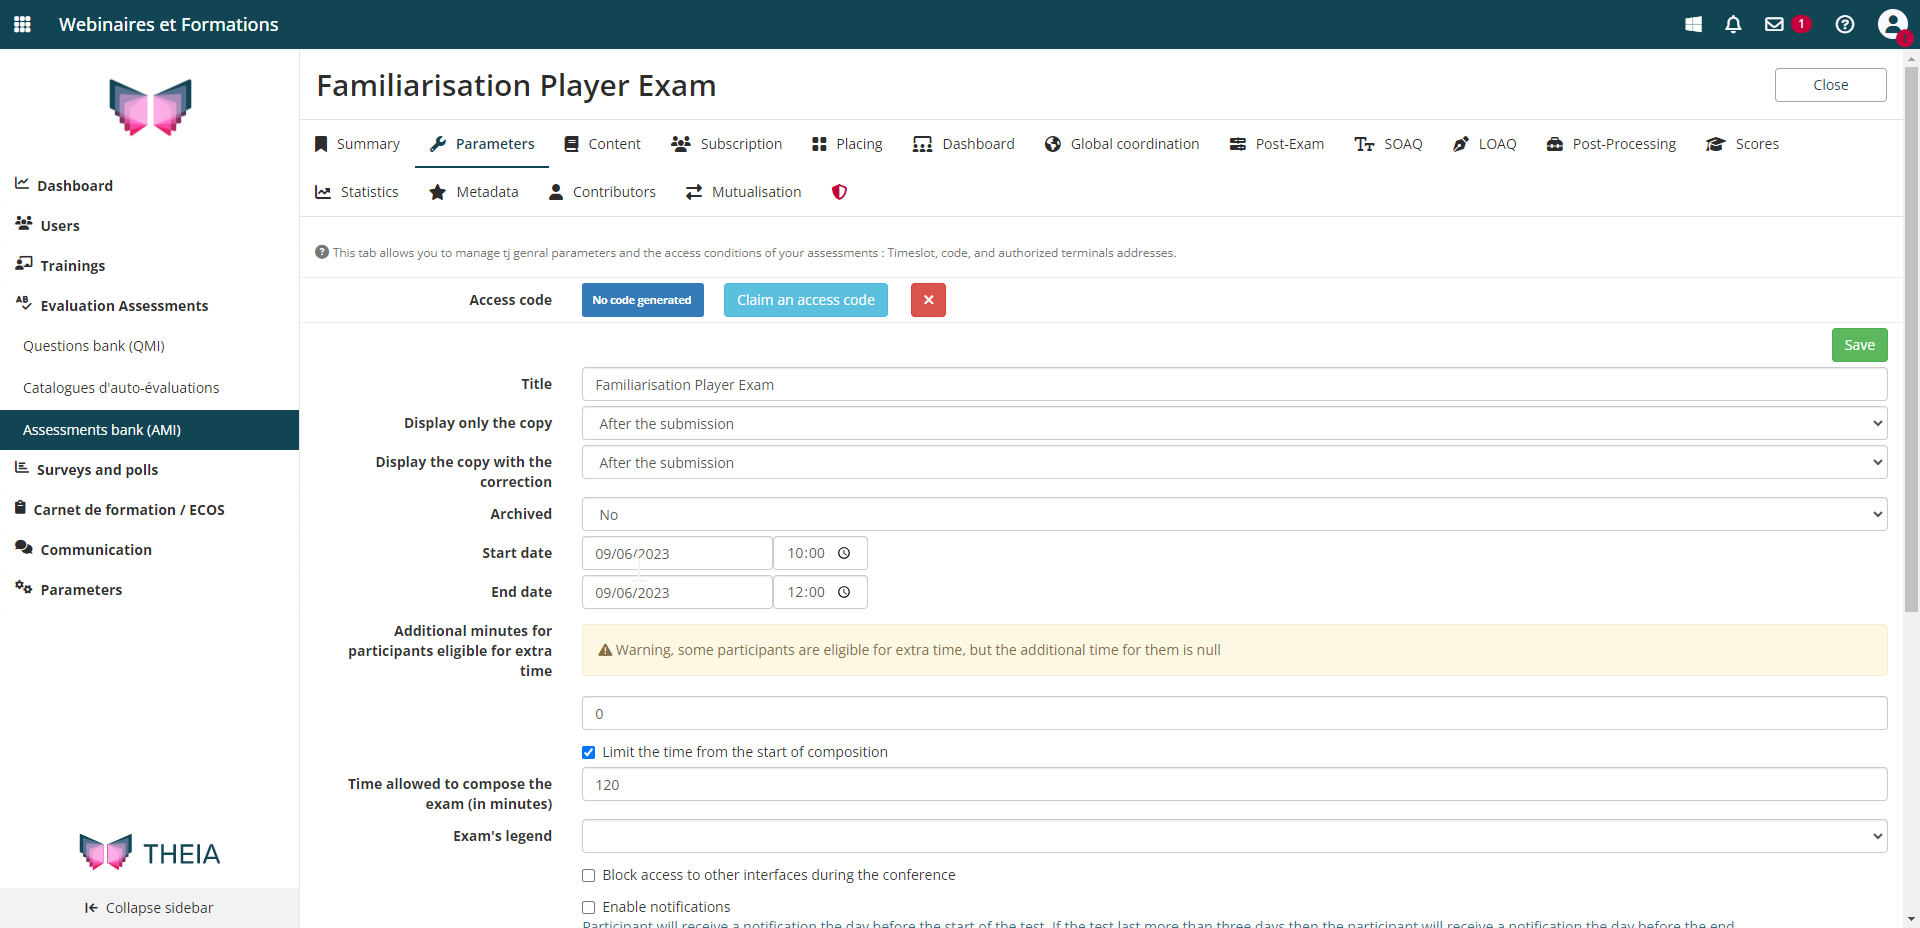
In the “Evaluation assessments” > “Assessments Bank (AMI)” menu, the “Settings” tab provides a number of options for configuring the test:
- Access code: For an exam, it is possible to change the mandatory access code. However, for a conference, no access code is entered by default. It is then possible to define one at random by clicking on the “Request an access code” button.
- Title: The title of the test will be displayed to students in the Learner’s Area.
- Show copy: The student may or may not have access to their copy of the test after the submission or completion date of the test.
- Show corrected copy: Students may or may not consult their corrected copy after submission or after the end of the test.
Archived - Start date / End date: The test will be accessible to candidates between these two dates.
- Additional minutes for candidates with exam accommodation : the time will be added up for all the candidates concerned. The accommodation configuration for a student is found in their user file. One-off settings can be made in the Registration tab. This configuration can extend the end time of the exam.
- Limiting the time from the start of the session: In the example above, even if the exam is open for 2 hours, the student will only have 120 minutes to complete their work. However, it is important to note that the student can only start composing at 10:00. So if they start at 11:30 they will only have 30 minutes (not 120) to complete their answers.
- Grading scale: When the corrected copy is handed in, the student will not see their grade but the corresponding indicator. The grading scale can be set in the “Preferences > Grading Scales” menu.
- Block access to other interfaces during the conference: Students will not be able to access their previously marked papers, training sessions, practice sessions, etc. once a test has started and for the duration of the test. They will only be able to open their test in their learner interface (it is recommended not to enable this option for long running exams).
- Activate notifications: The day before the exam starts, and the day before the exam ends (if the exam lasts more than 3 days), a notification will appear in the Notification Centre (bell icon in the top banner).
- Send email notification of assessment start: This box will appear if the “Enable notifications” box is checked. An email will be sent to the student in addition to a notification at the start of the test.
- Enable monitoring assistance (full screen mode): When the student accesses the event, the browser will switch to full screen mode after displaying an information message. Each time they leave this mode an alert is displayed in the Dashboard for the Student and the Supervisor.
- Empty clipboard (anti-copy and paste) when entering the exam: It will not be possible to copy text and paste it into an answer before the start of the exam if this option is enabled.
- Enable calculator: A calculator can be used directly in the exam window without leaving full screen mode.
- IP Restriction: No restrictions are configured by default. Once the address range has been added, only addresses within this range will be able to access the exam.
- Test Rooms: Students can be assigned to rooms. This can be exported to Excel.
- Instructions: Instructions are displayed to students when they access the test.
2. Participant registration
2.1 Group subscription
The Subscription tab is used to register students.
It is recommended that you use the Group Subscription tab to subscribe the groups to which the learners belong.
This method automatically enrols or deregisters users as they are added to or removed from the group during the course of the event.

2.2 Individual subscriptions
To view the list of subscribed students and add new students manually, go to the Individual Subscription tab.

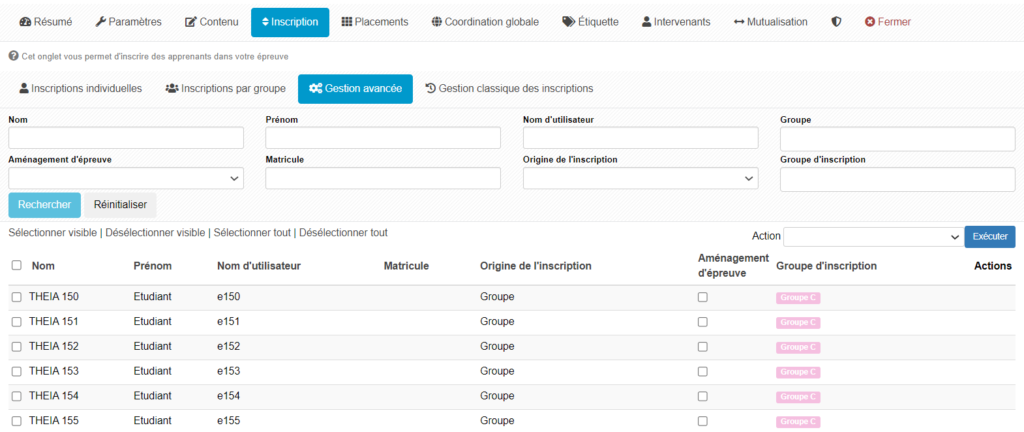
2.3 Advanced management
“Gestion avancée” permet :
- L’affichage de la liste des apprenants inscrits à l’épreuve.
- L’activation / désactivation / suppression des inscriptions en sélectionnant un ou plusieurs apprenants.
- L’export de la liste des inscrits au format Excel.

3. Adding content
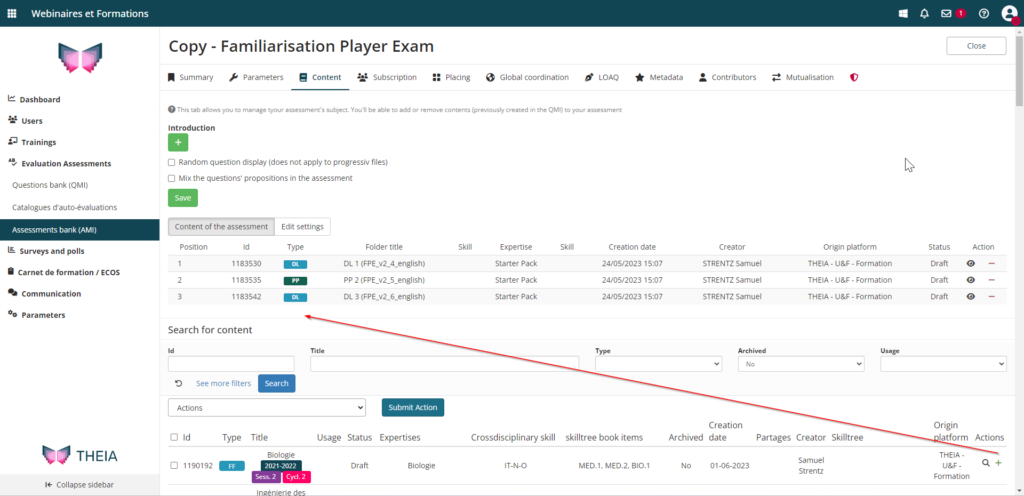
The upper part of the window shows the folders and questions in the test, as well as the option to add an introduction that will be displayed to the students. In addition, the boxes “Random questions display (does not apply to progressive files)” and “Mix the questions’ propositions in the assessment” allow you to mix the questions and/or suggestions in the test. Each copy will then be unique.
The lower section displays all the content available in the “Evaluation assessments > Assessments Bank (AMI)” menu. To add these items to the test, the user must click on the “+” icon. The file or question will then appear in the list at the top of the page. The magnifying glass icon opens a preview of the item.

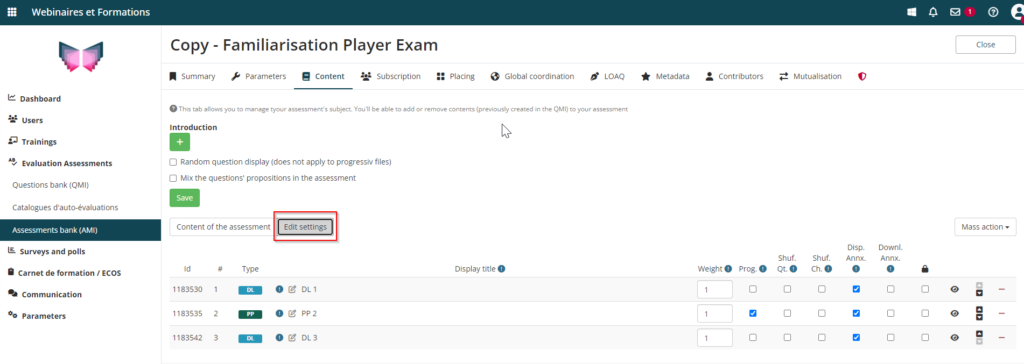
The “Edit settings” tab modifies the display of the list of exam folders in order to refine their behaviour. For each of them, it is possible to activate or deactivate progressivity (“Prog”), to mix questions (“Quest. Aléat.”) and proposals (“Shuf. Qt.”) and to display / download the appendices or not. The “Padlock” icon locks the file. It can no longer be modified in the QMI.

If you want to find out more, have a look at the tutorial below: “How do I monitor my students during the exam?”


