An activities path is a database of training content organised into a dynamic teaching sequence. Unlike the QMI, an activity path can be sequenced over time.
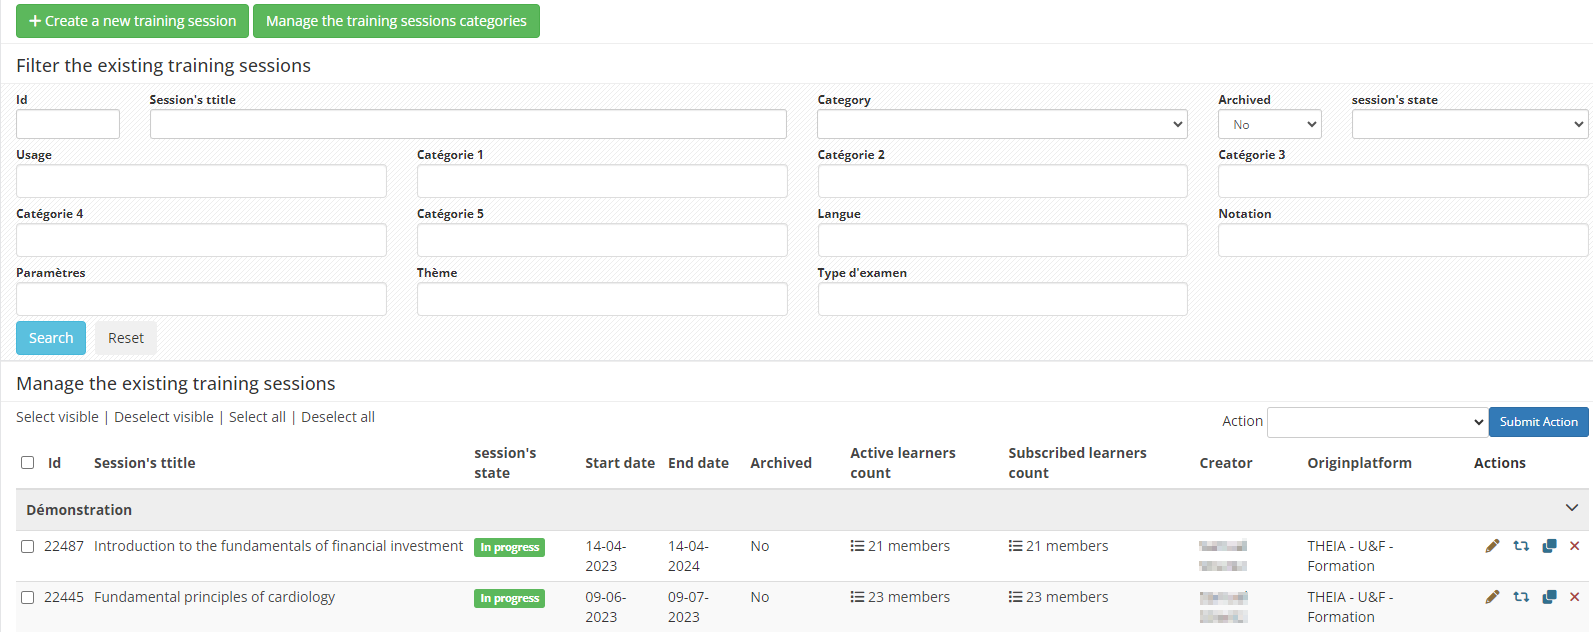
In the “Trainings” > “Activities learning path” menu, you can manage the list of activity paths, the categories and create new ones using the “Create an activities path” button. The course configuration window then displays a number of tabs:
- Summary: Overview of the course.
- Parameters: Configuration of the course by modifying the name, category, description or status (archived or not).
- Program: Content management.
- Training objectives: Management of the conditions to be met in order to access the various activities.
- Scheduling: Time sequencing of the course.
- Contributors: Add or remove instructors (individual or group management) authorised to modify the activity path.
- Sharing: Selection of partner platforms with which the element will be shared.
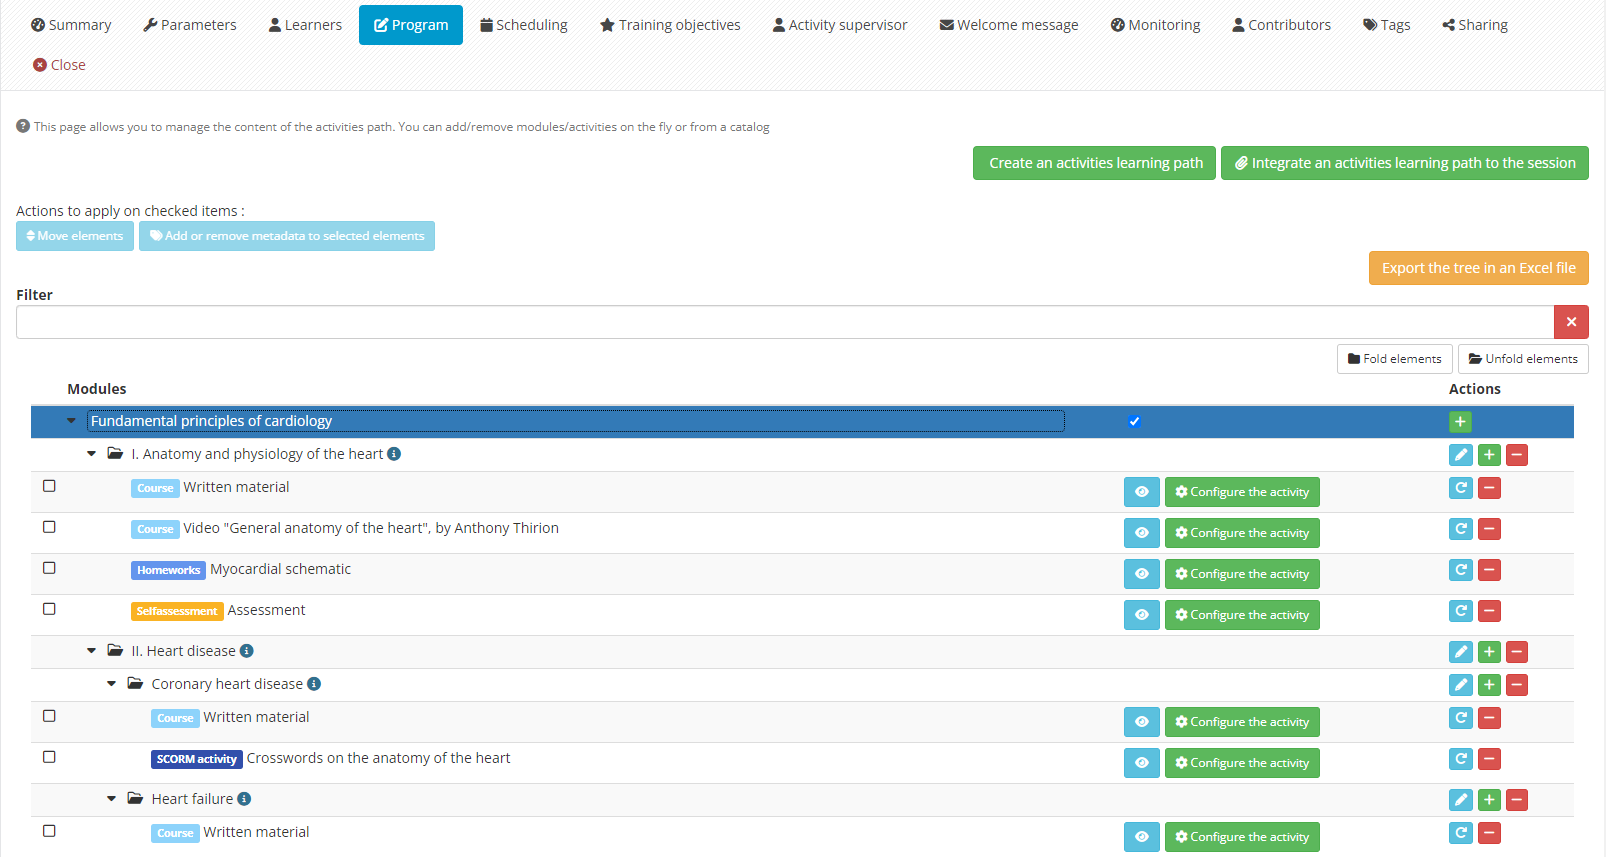
1. Editing activities
Content can be added, deleted, renamed and ordered.
The “Add to catalogue base” button is used to create the Catalogue Theme folder. The “+” icon creates a Sequence folder in which the following activities can be configured: Selfassessment / Certification / Chat / Course / Collaborative document / Survey / Exam / Forum / External link / In person lesson / Skilltree book / Scorm / Homeworks / Video conference.
Once the activity has been configured, the “Eye” icon displays the element as the learner would see it in a training session.
The “Drag & Drop” command can be used to reorganise the learning sequence.
2. Configuring training objectives
It is possible to make access to one or more activities conditional on the completion of one or more activities, grouped around a learning objective, for example:
- Having consulted or spent a certain amount of time on a course.
- Having submitted a document in a “work” activity.
- Completing a survey.
- taking part in a videoconference obtaining a minimum mark in a self-assessment.
- etc.
The name and description of the objective are intended to help the learner identify what is expected.
Before adding a condition, it is important to note that the condition elements vary according to the type of activity in the session. The “list of activities by condition elements” provides information about the rules that apply depending on the type of activity.
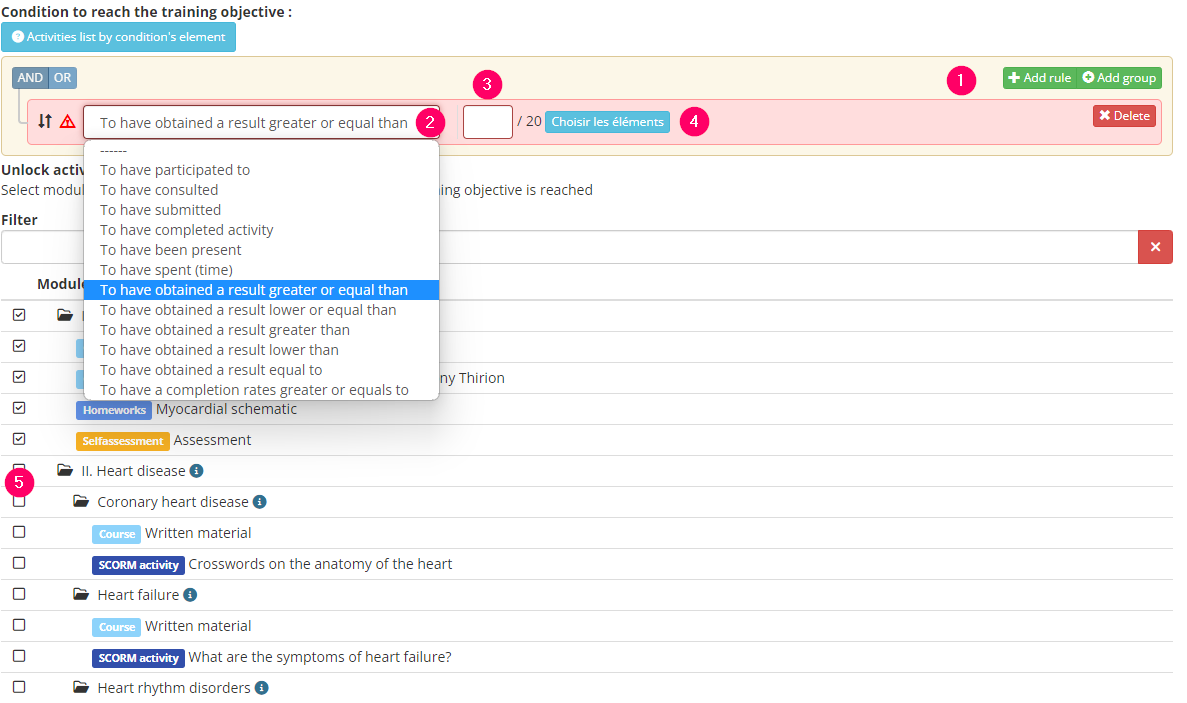
To configure the condition, the following steps must be followed:
- 1: Add a rule.
- 2: Select the verb corresponding to the condition you wish to add.
- 3: Enter the desired value to validate the condition.
- 4: Select the element for which you want to validate the condition. When you click on the button, a reduced list will appear according to the selected verb.
- 5: Identify the activity or activities that will be unlocked once the objective has been reached.
It is also possible to add several rules and use the logical connectors “AND” and “OR” to obtain the desired result.
Finally, this tab is used to define the importance of an objective in terms of validating the training session. The “Importance of objective (visible to learners)” parameter displays, at the follow-up level, whether or not the session has been validated by the learner.
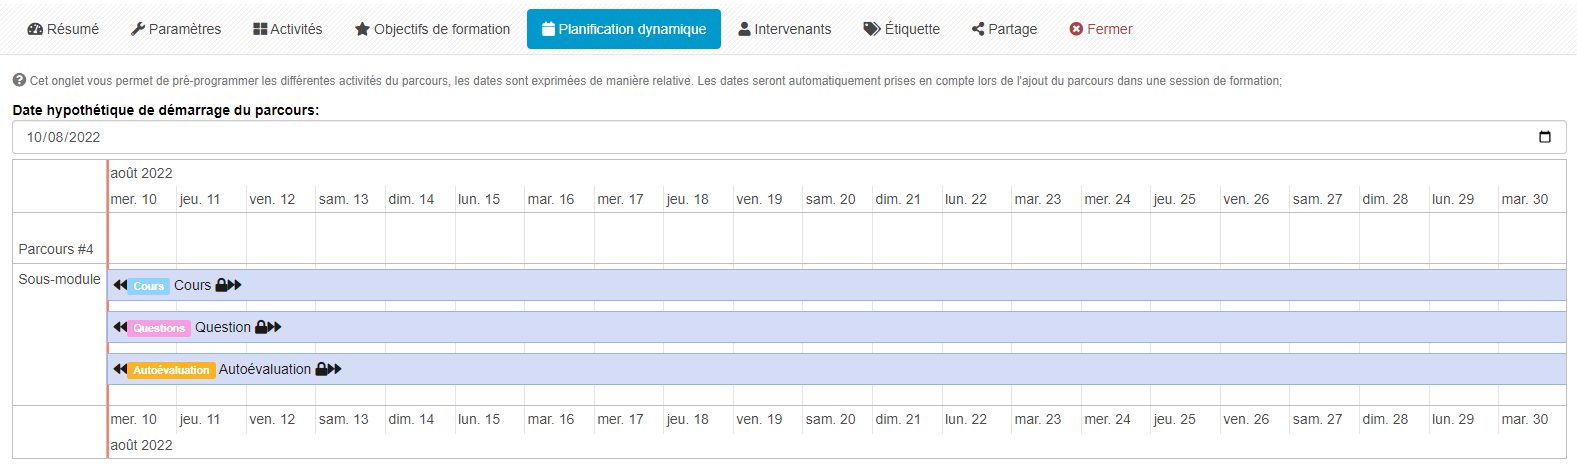
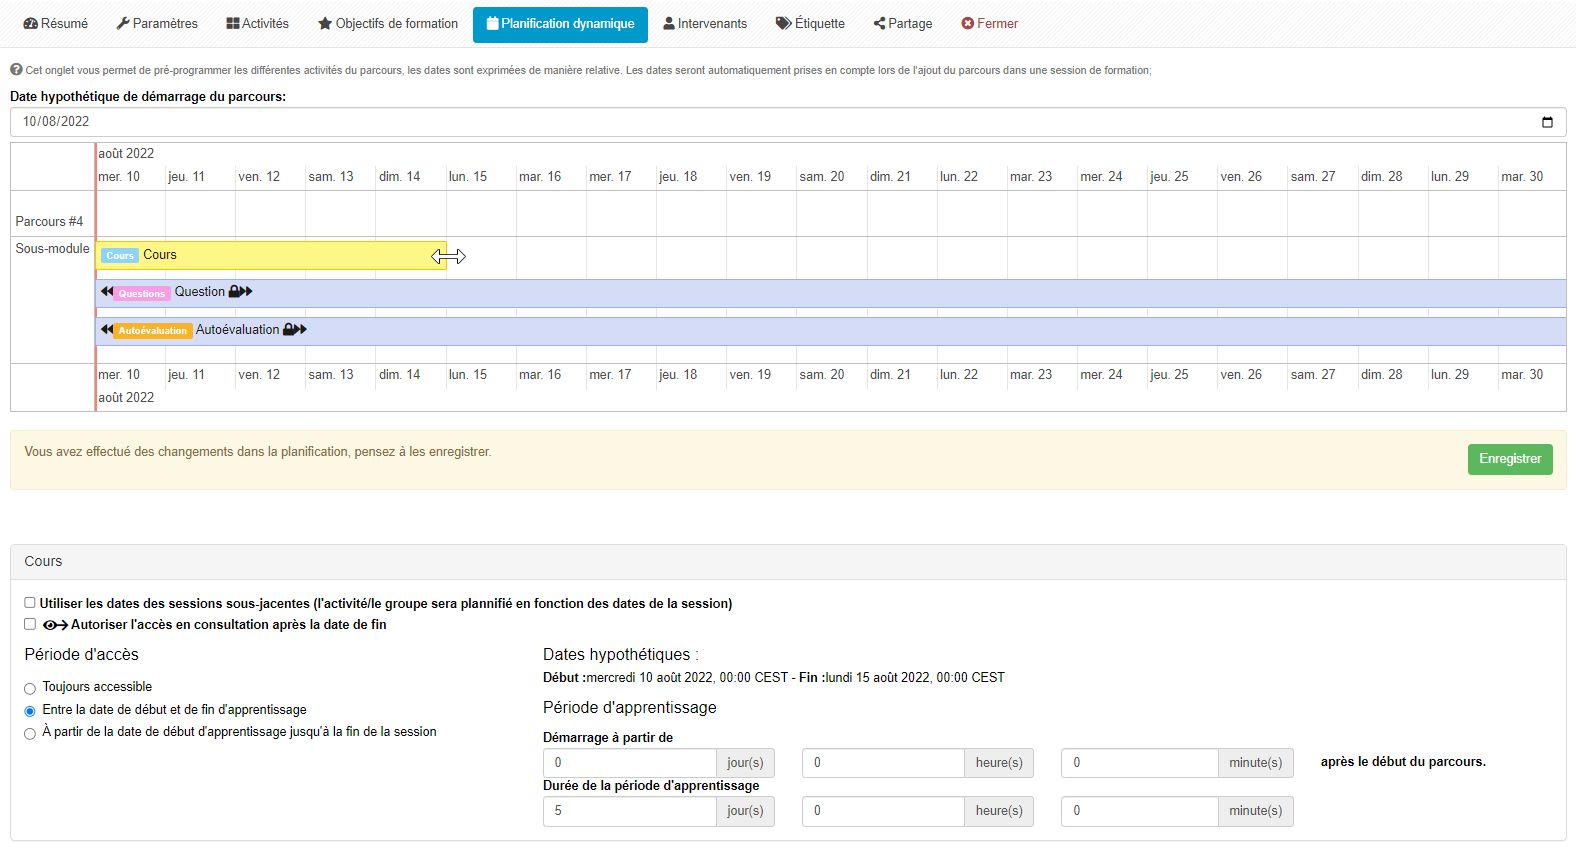
3. Activities planning
The “Scheduling” tab is used to time-sequence the course activities. The window shows a calendar with a “Hypothetical course start date” and all the activities. The dates shown are indicative. The important thing here is to define the number of days between two activities, as the dates of the future training session will be taken into account.
The “Padlock” icon on the activities means that this element is planned according to the dates of the training session in which the course will be integrated. By clicking on this icon, you can see that an insert appears at the bottom of the window and that the box “Use the dates of the underlying sessions (the activity/group will be scheduled according to the dates of the session)” is ticked.
By unchecking the box, as above, new parameters can be accessed:
- Access period: The access period can be strictly restricted according to the dates, but you can also allow access beyond these dates (the durations then become indicative and are used to plan the activity over time).
- Learning period: The activity can start X days after the start of the course and last Y days. This setting can also be made directly on the calendar, either by moving the whole activity by X days or by extending it by Y days (using Drag & Drop).
The “Authorise access for consultation after the end date” box gives the learner the freedom to consult different information (learning traces, copies, etc.) even when the training session has ended.
If you want to find out more, see the following tutorial: “Creating and setting up a training session”.


