You can create transcripts that your learners can consult in their learner space, in the “Resources” tab. On THEIA, a transcript corresponds to :
- a period (e.g. Class of 2023-2024)
- a category (e.g. Semester 1)
- a sub-category, in which you will enter learners’ marks and comments (e.g. EU Sociology).
On the student side, all the grades entered will be aggregated on a single transcript and will be broken down according to the different periods and categories entered.
Before creating your transcript, make sure you have created the periods, categories and sub-categories required.
1. Creating periods, categories and sub-categories
1.1 Creating periods
To create the periods you wish to use in your transcripts, go to the “Communication” tab > “Transcript” > “Manage periods” > then click on “New period”. The status of your period can be archived if you no longer wish to use it.

1.2 Creating categories and sub-categories
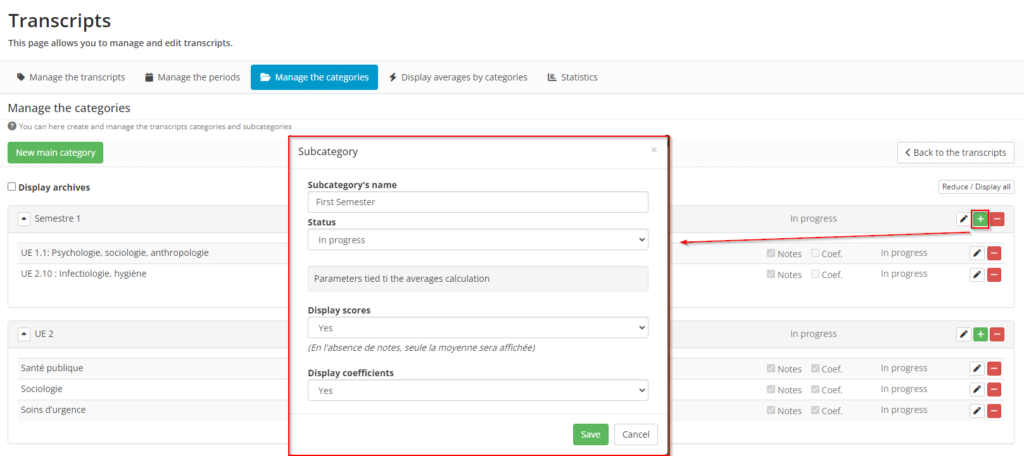
To create categories, go to the “Manage categories” tab, then click on the “New category” tab. The category can be archived if it is no longer in use.
To add sub-categories within it, click on the green plus, give your sub-category a name, define its status and choose whether you want to display notes and comments to learners.
2. Creating a transcript
Once you have created your periods, categories and sub-categories, you can move on to creating a new transcript. The idea here is to indicate in which period, category and sub-category you wish to enter the grades.
2.1. Creating and setting up a new transcript
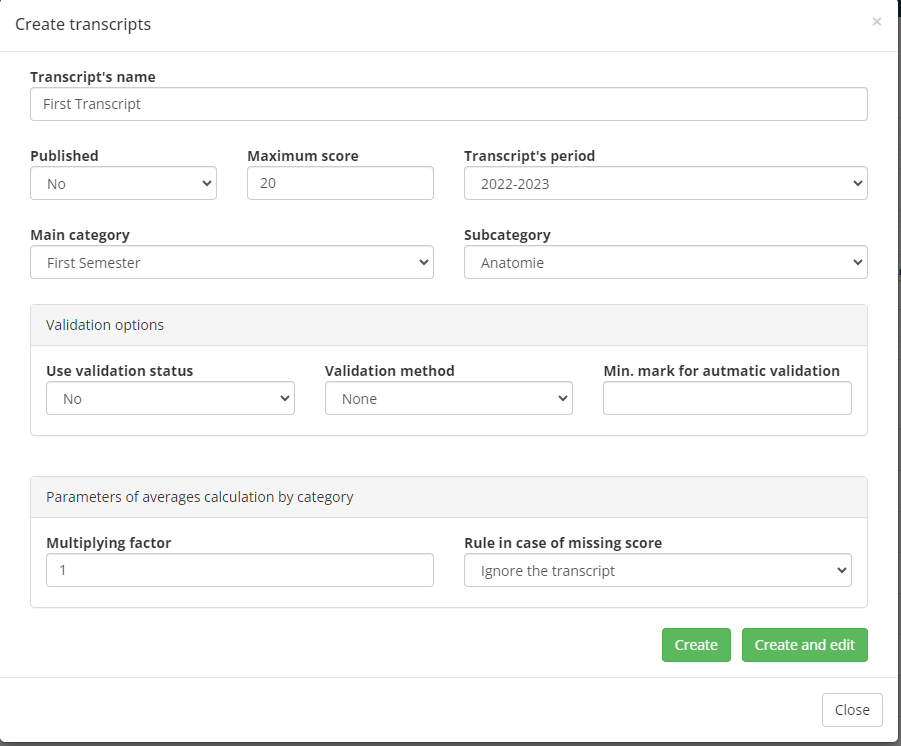
To do this, go to the “Manage transcripts” tab and click on “Create new transcripts”. There are several settings available:
- Transcript name
- Published: you can unpublish the transcript so that it no longer appears on the learner side.
- Maximum grade: this is the maximum grade a learner can achieve
- Period: generally corresponds to years or class titles
- Main category: often corresponds to semesters
- Sub-category: generally used to name the different subjects or UEs that you wish to include on the transcript of records
- Validation options: a validation status can be indicated on the learner’s transcript; you can choose between 2 validation modes (having a positive mark or having a minimum mark).
- An average calculation is available for each category, as well as a rule for the absence of a mark.
2.2 Subscribing learners
To select the learners concerned by this transcript, you can go to the “Learners” tab of your transcript, carry out a search using the various filters available and then register the learners by selecting them and clicking on “Register selection”. You can unsubscribe them at any time by clicking on the cross in front of each name or by clicking on “Unsubscribe all”.
2.3 Importing notes
There are several ways of adding marks to your transcript: either you can enter the marks manually in the “Enter marks” tab (this tab also allows you to view the mark and commentary for each student) or you can import them using an Excel file or directly from an exam that has taken place on THEIA.
2.3.1. Manual note entry
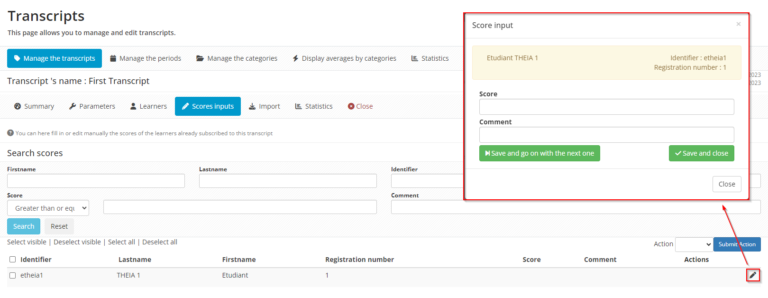
To enter learners’ grades and comments manually and individually, you can go to the “Grade entries” tab of your statement and click on the pencil next to the learners’ names. This will allow you to give each student a grade and a comment, with the option of saving and moving on to the next one.
NB: comments are limited to 255 characters including spaces.
2.3.2 Importing notes
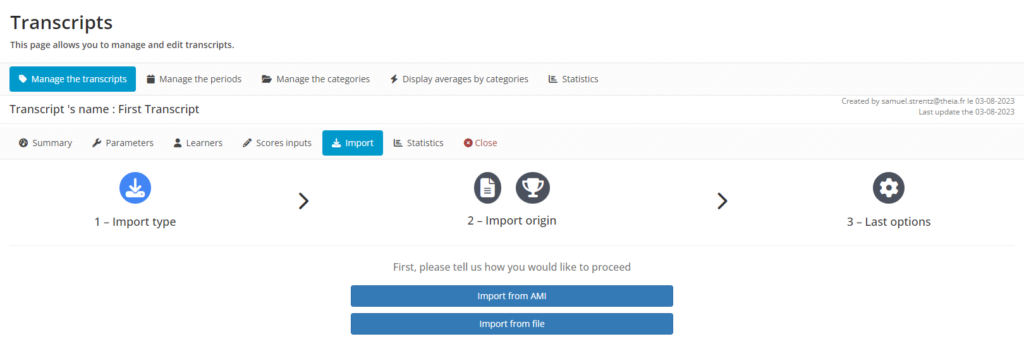
To import your notes, go to the “Import” tab. Here you have two options:
- You can import marks directly from the IGE by clicking on “Import from AMI” > when you have found the relevant exam you can click on “Use this one” and then choose the marks you wish to use between “Weighted average”, “Standard average”, “Mark by file” by clicking on the column heading. You can also choose to import only the grades of learners already on the transcript by clicking on the “Export only the grades of learners already on the transcript” box. Finally, you can click on “Proceed to import”.
- You can import grades using an Excel file, a model of which can be found in the “Import” tab > “Import from file” > Your file must contain the following columns, in this order: Identifier / Last name / First name / Personnel number / Grade / Comment (the personnel number and comment columns are optional). Once your file has been created, you can click on “Choose a file”, retrieve the file in question and then confirm the import.
NB: comments are limited to 255 characters including spaces.
2.4. Accessing statistics
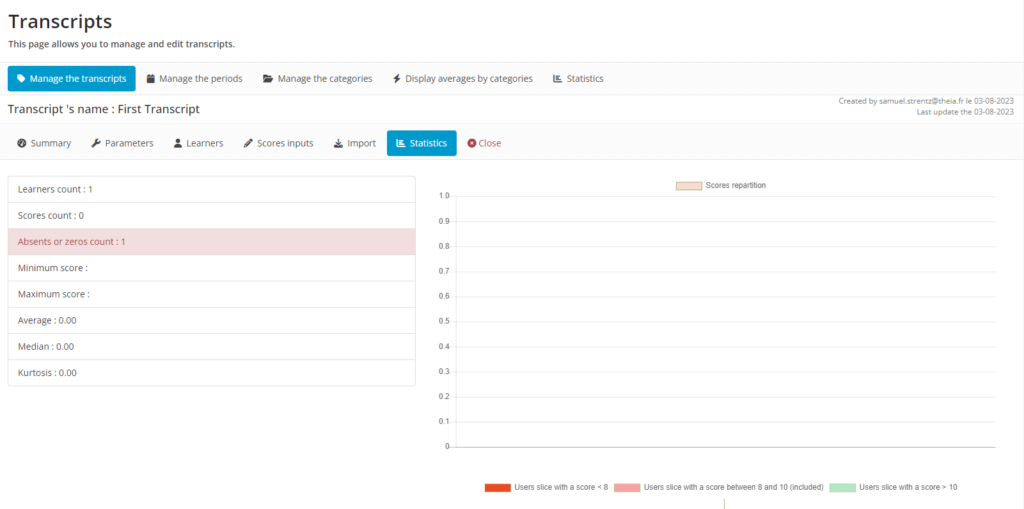
You can access the statistics for each transcript by going to the “Statistics” tab on your transcript. You can see the breakdown of marks in different formats, as well as the number of learners, the number of marks entered, the minimum mark, the maximum mark, etc.
If you want to find out more, have a look at the tutorial below: “Setting up a test in advance”.


