1. Manual creation
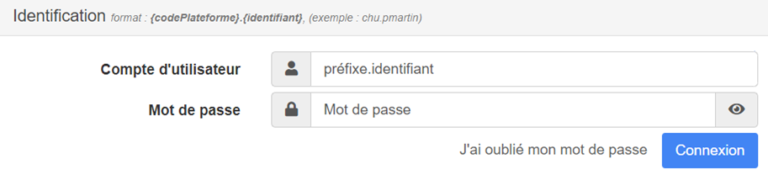
An account is said to be “manual” or “local” when it has been created directly from the platform, rather than using an automated system. This term is used in account management. A user with a local account will have to choose the “local account” connection option to access their content and use their THEIA username and password.
As the manager of the THEIA platform in your establishment, you will need to create accounts for your users. This can be done automatically or manually, depending on the technical and organisational facilities available to you.
There are two ways of adding users to the platform:
- Manual account creation (individually or by import) directly in your platform
- Automated account creation (from an SSO or API)
1.1. Adding a user
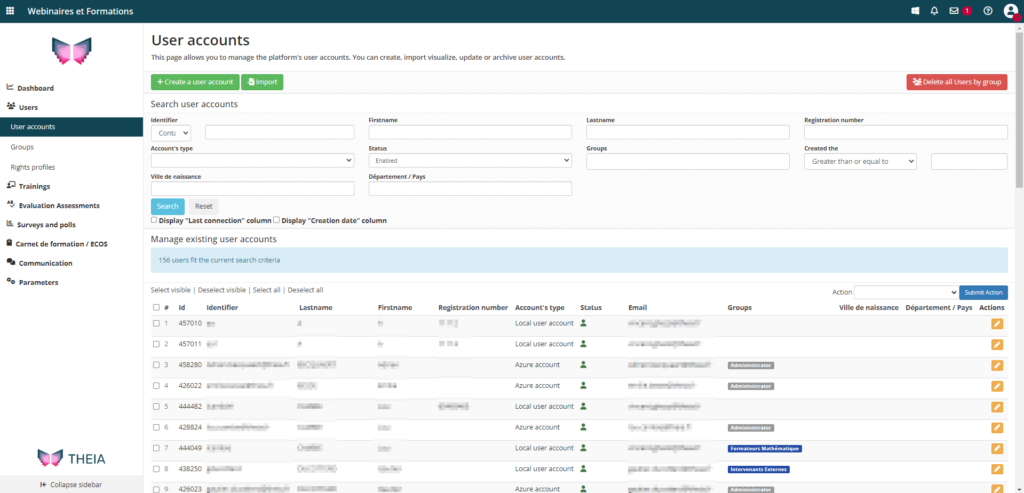
To create a user on the platform, click on “Create a user” in the “User accounts” tab. A list of fields will appear, allowing you to fill in the information required to create the account.
If you want your user to receive an email informing them that their account has been created (and also giving them their login details), you can click on “Send a welcome email with login details”. An automatic email will then be sent.
Not all of these fields are mandatory. Here is the minimum information required:
- User first and last name
- Username: this must be unique and specific to your user, and always begins with your platform code. By default, the platform will generate an identifier based on the first letter of your user’s first name + surname. But you can build it as you wish. Notes: if your user’s default username is already taken, a number will be added at the end.
- Email: must be valid but is not necessarily unique.
- Password: this is a temporary password. The definitive password is chosen by the user on their first connection and is not known to the system, in order to protect user data.
1.2 Importing users in bulk using Excel
If you have a large number of users to create, it’s best to import an Excel file (in CSV format), which will allow you to create all your accounts en masse. Note that this method can also be used to update existing accounts (adding them to a new group, for example).
1.2.1. Downloading the template
To create the import file, go to the “User accounts” tab and click on “Import”.
This page provides information about the structure of the import file. This is where you can import the file when it is ready, and also where you can download the file template. Click on the button to download the Excel template from your browser.
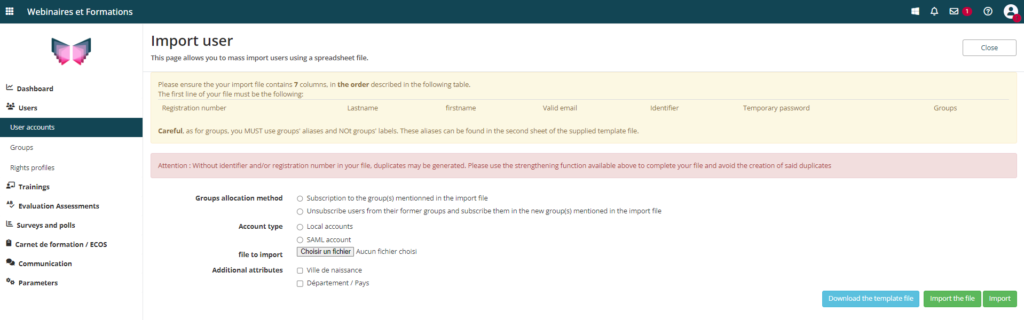
This file has two advantages: firstly, the columns are provided with the correct fields, and secondly, in the second tab of the file you will find the codes for the ‘groups’ that exist in your platform.
1.2.2. Designing the file
In the main tab of the file, you can enter the information required to create/modify accounts. As with manual registration, some fields are mandatory:
- User number: not mandatory
- User surname and first name
- Email: must be valid but not necessarily unique.
- Username: mandatory if updating an account, optional if creating an account. In this case, the username will be generated automatically on the basis of “first letter of the first name + surname of the user”.
- Password: this is a temporary password. The definitive password is chosen by the user on their first connection and is not known to the system, in order to protect user data. Even if you are creating an account, you can leave this column blank, as it will be generated automatically during import.
- Groups: the groups to which users are registered (via the group alias). This is a mandatory field.

1.2.3. File consolidation
Once you have finalised your file, simply import it into the platform. Go back to the “Import” page in the “User accounts” tab and choose the import options that suit you best. Also select “Local account” if you are creating a new account. You can then add your file.
Once this has been done, you can either choose to go through a file consolidation stage, or import the file directly as is.
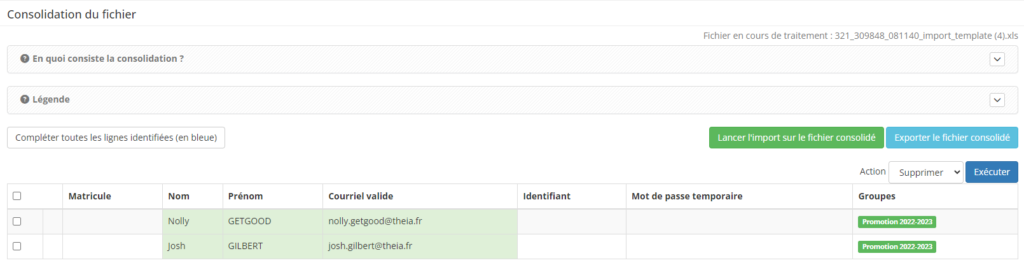
The consolidation stage is used to compare the existing accounts in your platform with the identifiers written in your file. In this way, the platform can ask you to confirm any potential duplicates: if two people have similar names, you can decide that they are in fact the same user (and update their account with the new fields) or decide that they are simply a homonym and create a new account and another identifier.
For each user line, you can check whether there are any errors or duplicates found, and decide on an action if necessary. You can then launch the import.
Your users are now created!
1.3. Creating user accounts in 3 questions
1. I get an error message when importing my user file. What should I do?
It is possible that your file does not comply with the correct rules. Here are the best practices to follow:
- Generate the template file for each new import. Even if it isn’t obvious at first glance, a file that has already been used may have had its structure or cell format modified. As a result, it may no longer correspond to the platform standard and the import will not work. It is always a good idea to start with a clean, new file that has been generated recently.
- Avoid copying and pasting from a previously used file. Invisible layout options can be pasted into the cells and interfere with the import. If you need to copy and paste, always remember to use the “paste raw data” option.
2. Do I have to create student accounts in Theia in order to link them to a training session or exam?
For a user to have access to the platform, an account must be created. However, this can be done after the exam or course creation stage, thanks to the group concept. In fact, by registering a group for an exam or a session, each account added to the group will automatically be registered for all the content that uses this group. It is therefore entirely possible to create a group, attach it to content and then populate the group.
This is particularly useful in the case of automated enrolment, where students need to log in once to generate their account on the platform. By proceeding in this way, there is no need to wait for all the students to log in before finalising registration for their exams/training courses.
3. I didn’t send an automatic email when the account was created, or I created the accounts via a bulk import: how can I send their logins to my users?
It is perfectly possible (and even recommended!) to send an informative email to your learners when you create their access to the platform. If you’d like to do this, here’s a tutorial on managing email in THEIA.
If you want to find out more about how to send e-mails via the messaging system, you can read the following tutorial: “Sending an identifier by messaging service“.
2. Automated creation from an SSO or API
THEIA platforms are compatible with automated authentication systems that eliminate the need to create user accounts manually. If you have any questions or require further information on this subject, please do not hesitate to contact us. Our teams will be able to advise you on whether such a process can be implemented in your organisation.
If you want to find out more about tracking users, you can consult the following tutorial: “Checking rights, access and monitor user activity“


