THEIA provides platforms for many certification and training organisations. Although the platforms all have an identical visual environment, we want users to be able to recognise their institution at a glance. To achieve this, the THEIA platform offers customisation options that can be defined for all users of the same platform. This tutorial will show you what can be customised and how to do it.
1. What can be customised in THEIA and for whom?
THEIA platforms are neutral by default. However, it is possible to personalise them with a name and an image (e.g. the school logo).
The customisation of a platform can only be done by an authorised user and will be visible to all users of this platform, in all interfaces. The title will appear in the top bar of the platform, while the logo will appear at the top of the side menu (see example below).

2. Access the platform customisation options
To access the platform customisation page, go to the manager interface and click on “Settings” > “Customisation”.
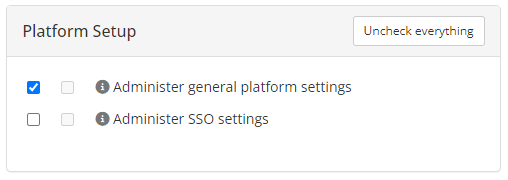
Please note: To access this area, you must have the right to ‘Manage the general settings of the platform’. As this is a new feature, it is possible that you are an administrator but have not been granted this right by default. Do not hesitate to check your profile or your THEIA administrator group within your school. Use this right sparingly: any changes made in the parameters menu will apply to all users!

If you want to find out more about user rights, see the “Rights Profiles” tutorial.
On the “personalisation” page, you will find a field allowing you to define or modify the title of your platform, as well as an area for importing your logo.
The logo image must be in JPEG or PNG format and must not exceed 3 MB. When you add an image, you can preview the result (and the size it will ultimately be: if the image is larger than the area provided for the logo, it will be reduced) before confirming.

If you no longer wish to display a logo or image on your platform, simply click on the “trash” icon. The side menu will then return to its original position, and you can always add a new one when you need it by following the same procedure.


